
Last year I was asked to repair the Minnesota RollerGirls T-Shirt Cannon that failed mid-season. I created a temporary fix, just in time before the game. The repair got us talking about the future of T-Shirt launching technology. What would make this cooler? How can we improve this technology to make Launcher 2.0?
Minnesota RollerGirls’ Wet Spot (Lucas Saugen) and I started brain storming. We met for lunch and started throwing around ideas.
What could we do better? In five years, where will the technology of T-Shirt launching be? How can we make sure that there wouldn’t be a T-Shirt Cannon technology gap at the Minnesota RollerGirls?
Also, how can we make it so that the darn thing doesn’t break every season.
This blog post details some of the build, process, and technology that went into making the new Raspberry Pi powered T-Shirt Cannon for the awesome Minnesota RollerGirls team!
First we came up with a list of things that we wanted for the new T-Shirt Cannon. This would ensure it would be a viable technology for future games and entertainment.
Our Ideas:
- Tweet – (Yes, Tweet when it has launched a T-Shirt)
- Camera – To capture that special moment of hitting someone in the face.
- “Capture all the stats!” Tweet the stats about the launch
- Launch more than one shirt in a time-out period, which is ~60-90 seconds.
We also got ideas from the teams:
- lasers
- smoke
- sparklers
- cat cannon
- choco taco launcher (if we can get it to stay together, we are there with you!)
- kitties in skates
- meows (Maybe a future speaker system upgrade)
- makes bubbles (This we might do. Either this or next season.)
- gears and cranks that move robot style
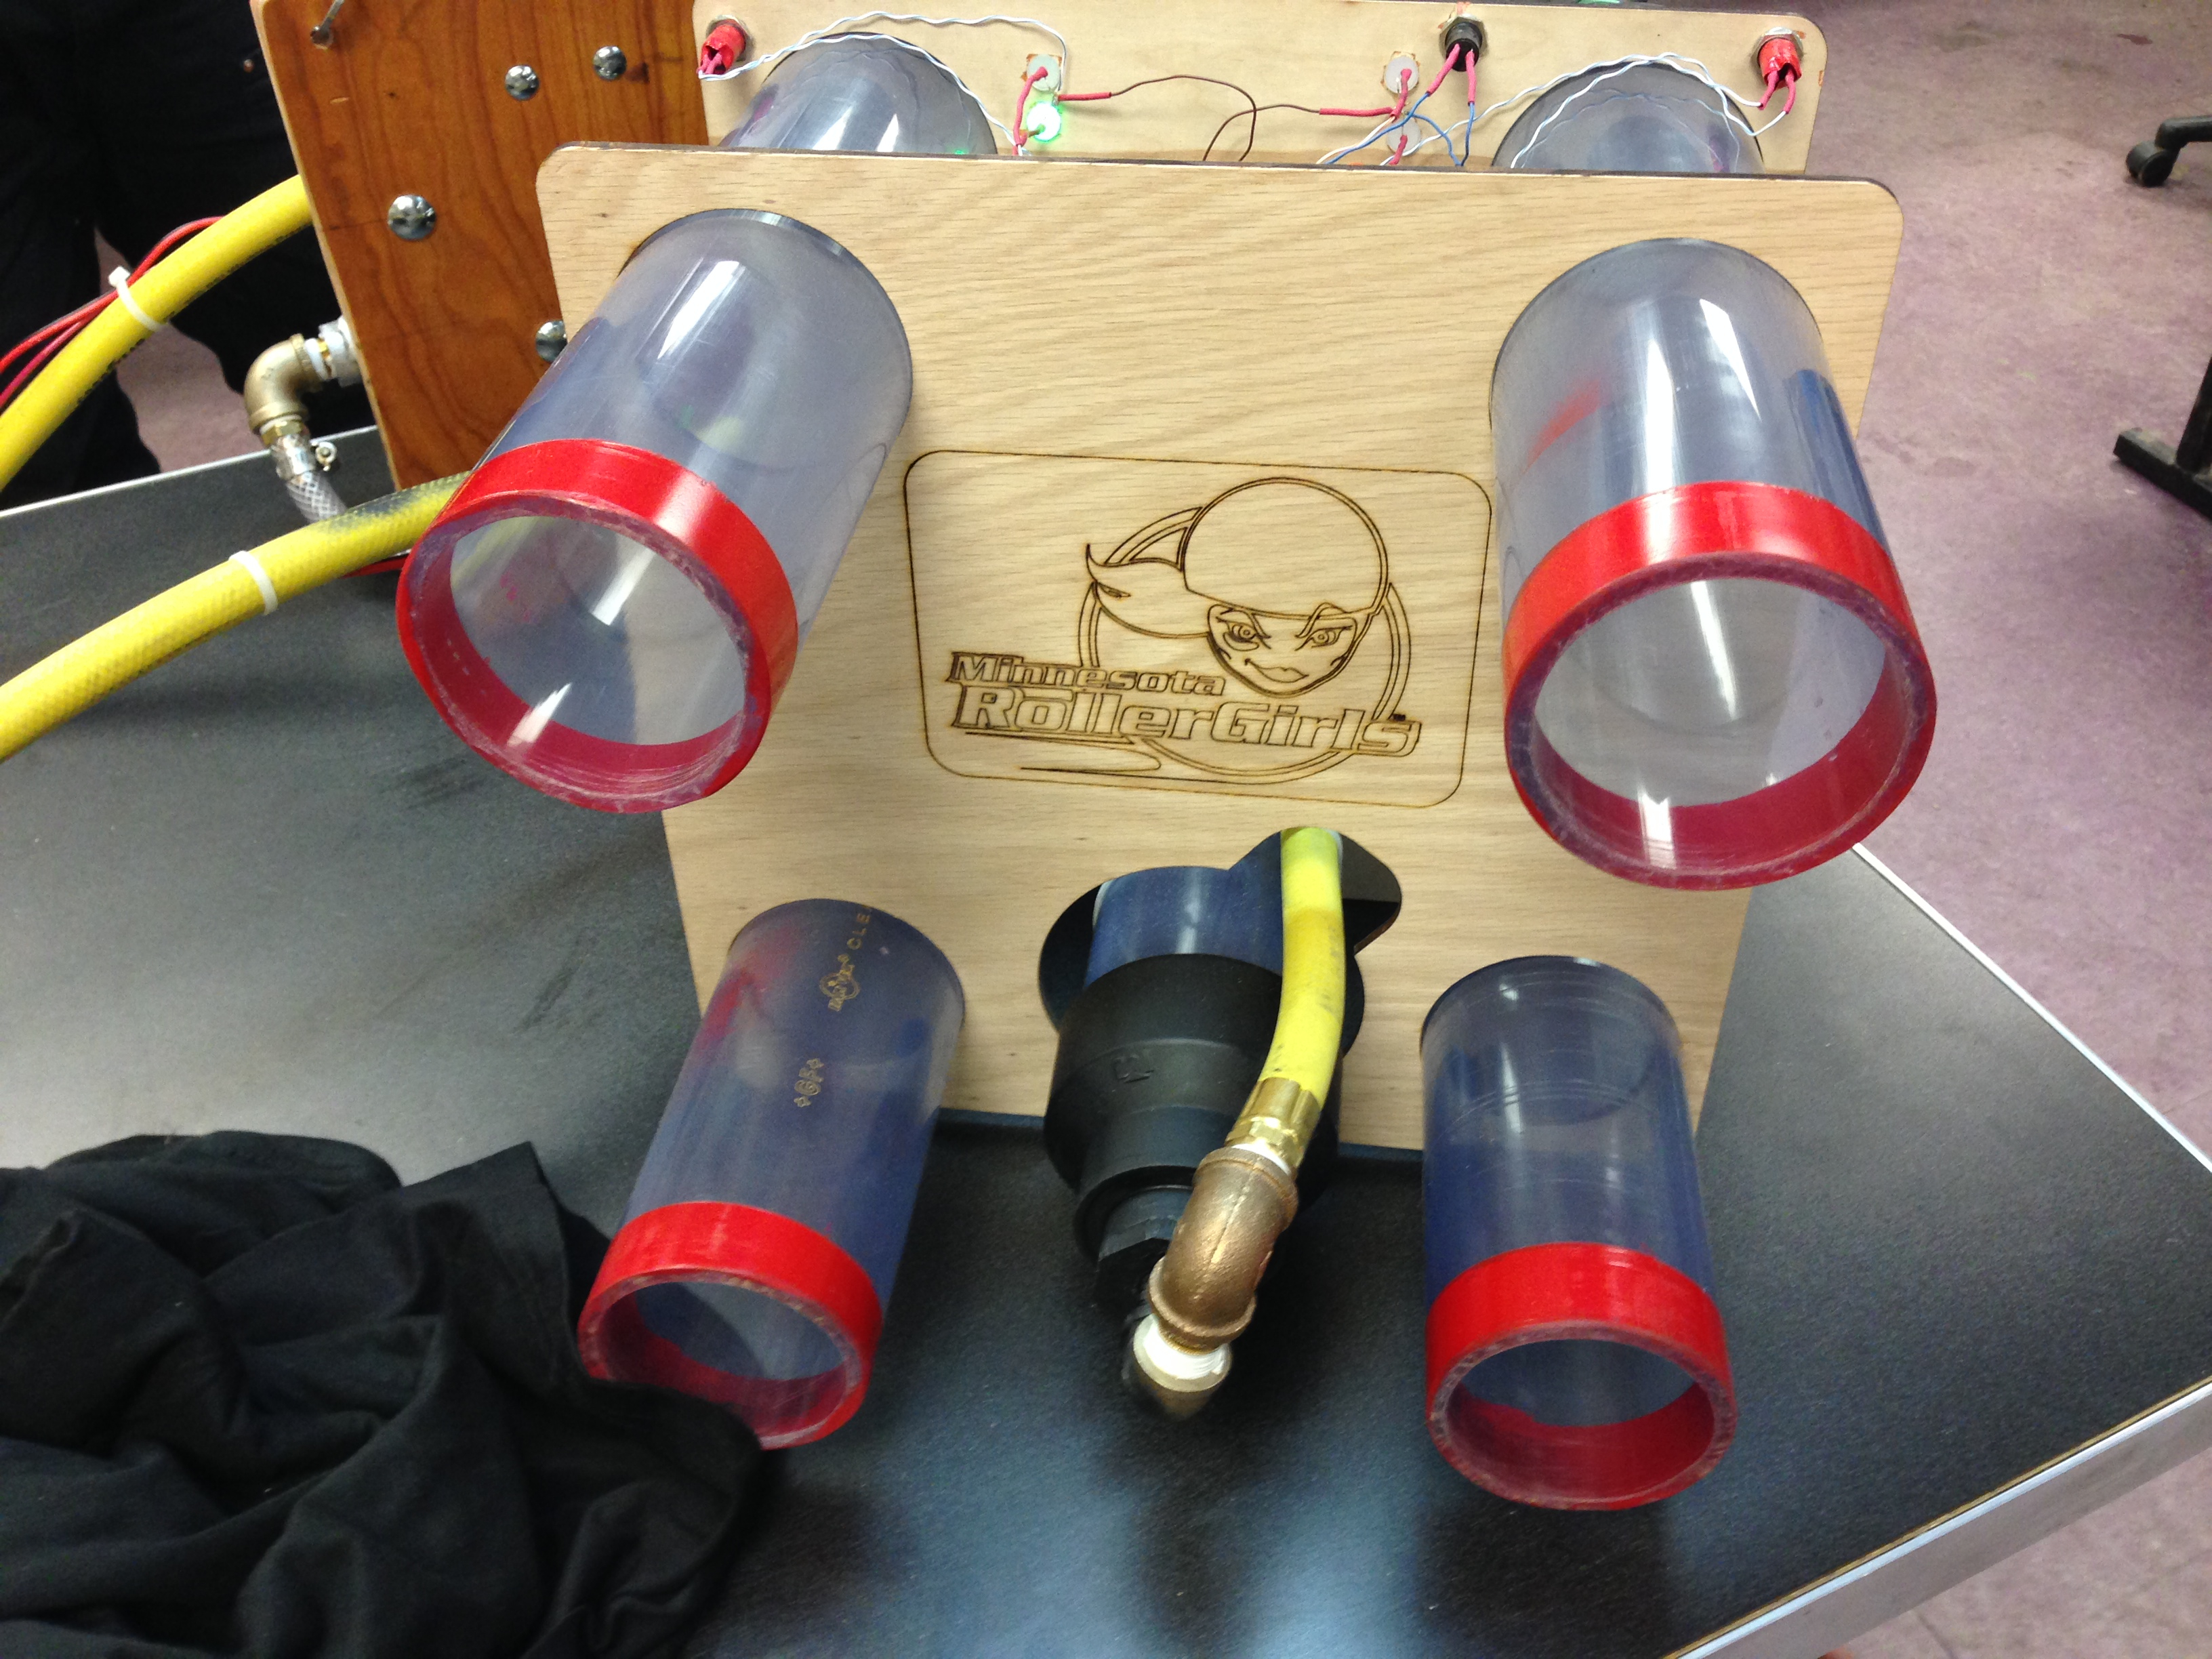
After we gathered our initial ideas, I set out to work on designing something that was portable, and could fire off more than one T-Shirt in a timeout period.
So, I figured we would first start with attempting to shoot four T-Shirts in a time-out period. Not necessary all of them at once, as we didn’t want someone running for a shirt and bonking heads. That would also require massive tubes and tanks to allow for the volume of airflow needed for that task.
As any good builder does, I did some research, and found a few folks who had made a launcher that could be filled and launch more then one shirt before it needed a refill. One of them being a design from Kip Kay, who has a video and a PDF of how to make a T-Shirt launcher with a reserve tank, and a manual valve. With that and other designs in mind, I designed a system that would support launching using four separate barrels.
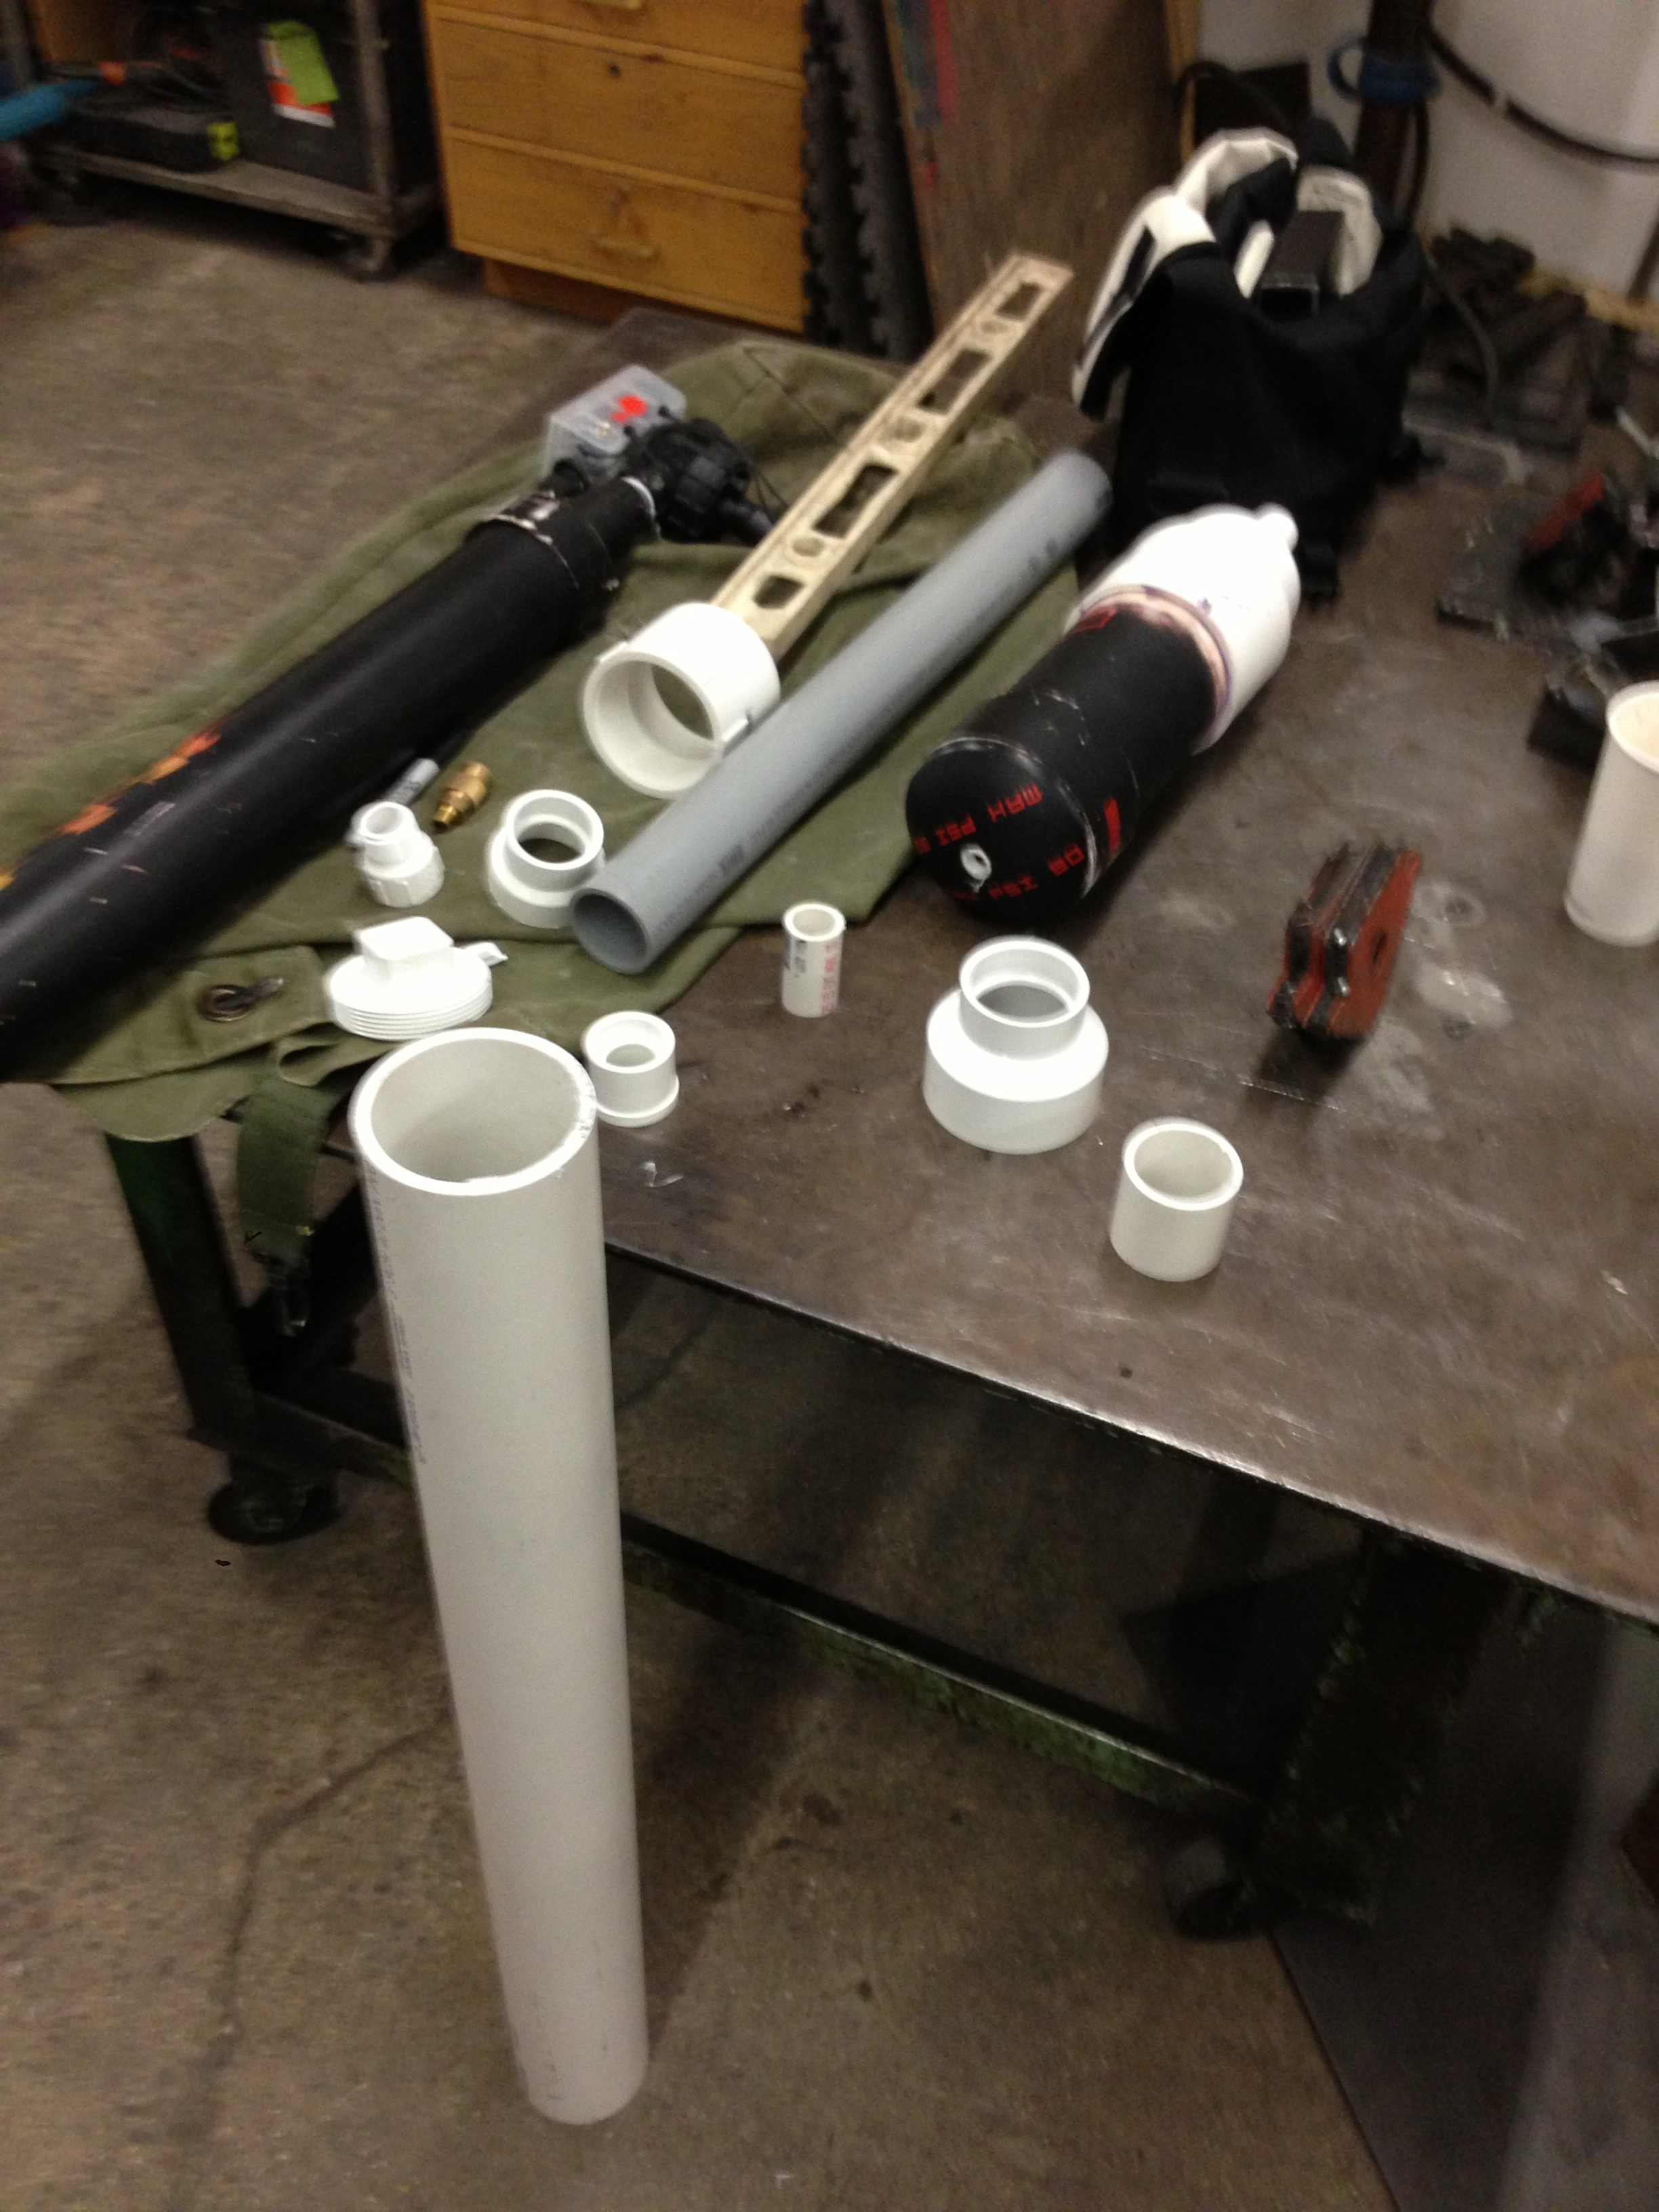
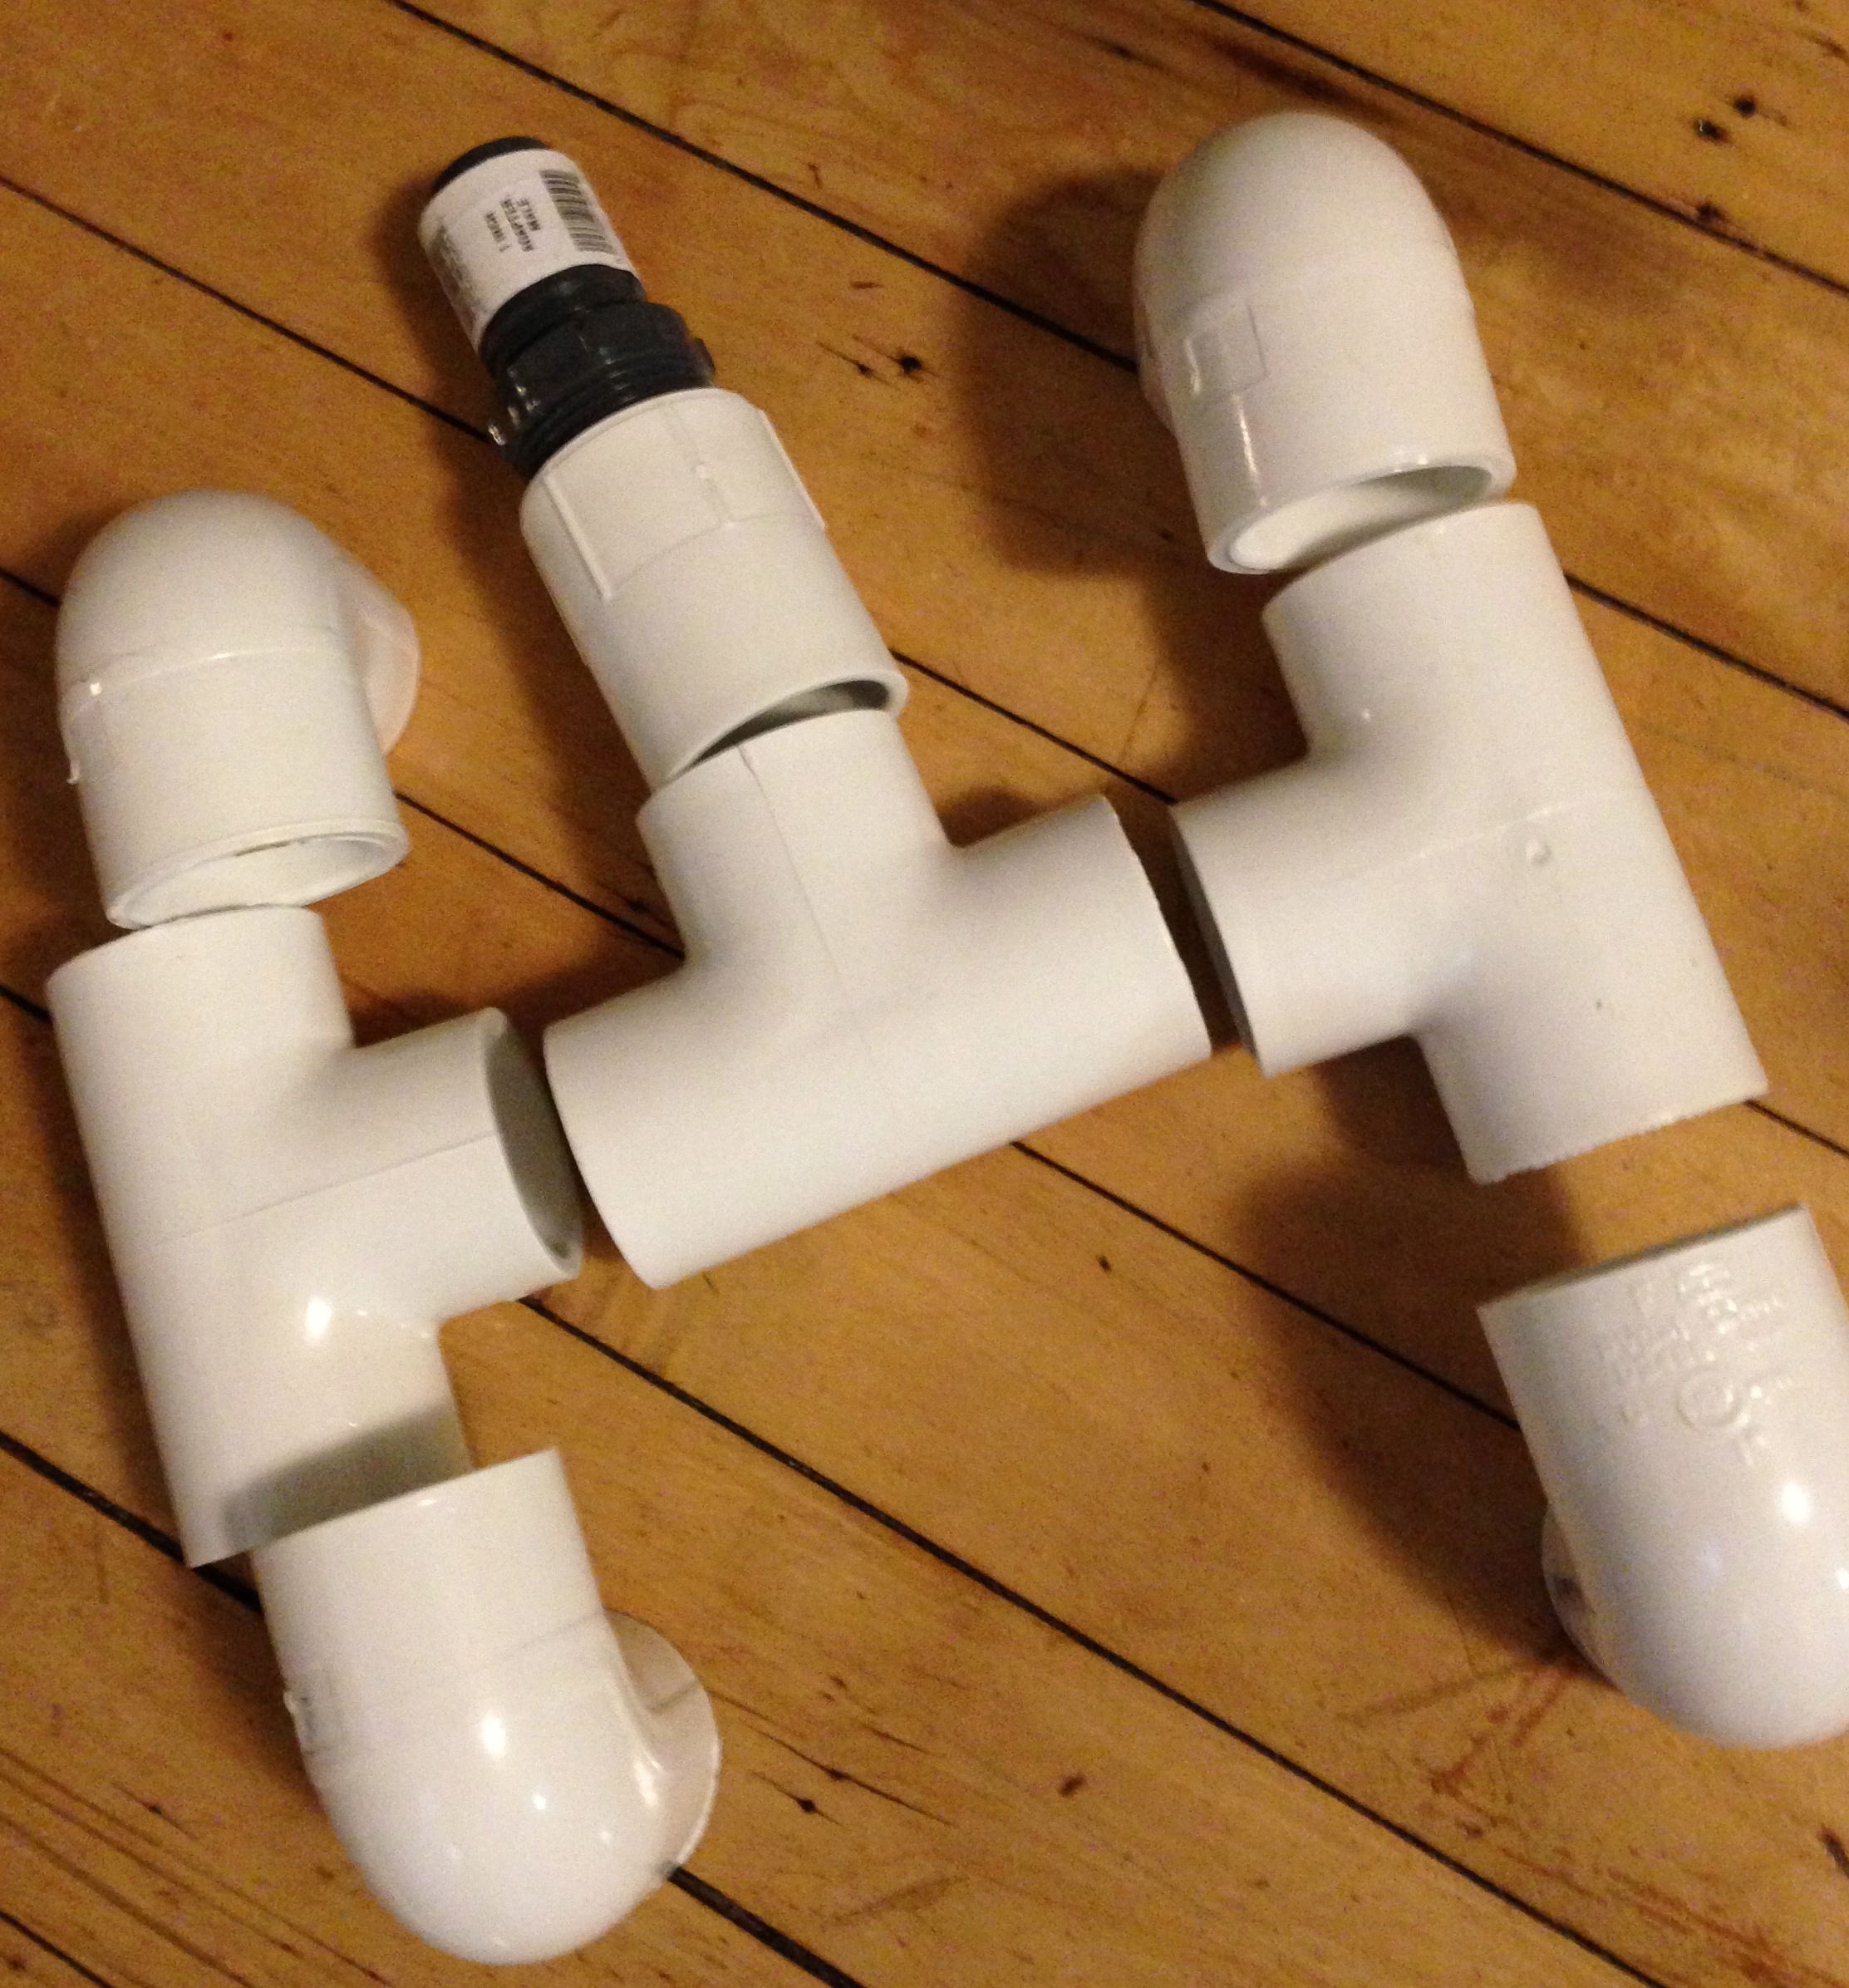
Plumbing and pipe works
Before I blindly go buying materials, I needed to do some math. And a bunch of it. We needed to know how much material to buy, and how big of a tank we were going to need. We also needed to know the volume of air inside the barrels, and how much air each shot was going to use. Going forward, we decided to standardize on using three inch diameter Schedule 40 Clear PVC.
WARNING, MATH ALERT!
Now we first needed to find out the volumes that will be required to launch a T-Shirt into the crowds! The Schedule 40 PVC clear has a diameter of 3.068″. The formula for volume is: V = πr2h.
First we first need to divide the diameter by 2 to get the radius, r.
r = 3.068 / 2 = 1.534

Once we know the radius, then we need to take that number, and square it. We do this, as we want to calculate the volume of both halves of the circle.
1.534 ^ 2 = 2.353156
Great! Now we need to multiply that by Pi (3.14), and find out the volume of air, inside one inch of the pipe.
2.353156 * 3.14 = 7.388in^2
Ok, but we have 14 inches of volume that we need to figure out, so we need to calculate the entire volume by multiplying that by 14.
7.388 * 14 = 104.432in.^3
This is measured in Cubic Inches, however, most air tanks are measured using Gallons. To make this easy for the other calculations, I then converted the in^3 number to gallons. To do that we divide the volume by 231. Why 231? Because 231in^3 = 0.99999999999982 gallons. Seems close enough to work.
104.431in^3 / 231 = 0.452gal
Awesome. Now we know that we know that we need at least 0.5 of a gal of air / shot to fire the T-Shirt out of the barrel. We will also need to account for the air volume inside the hoses that connect everything together. So we are looking at ~0.639 to 0.7 gal / shot.
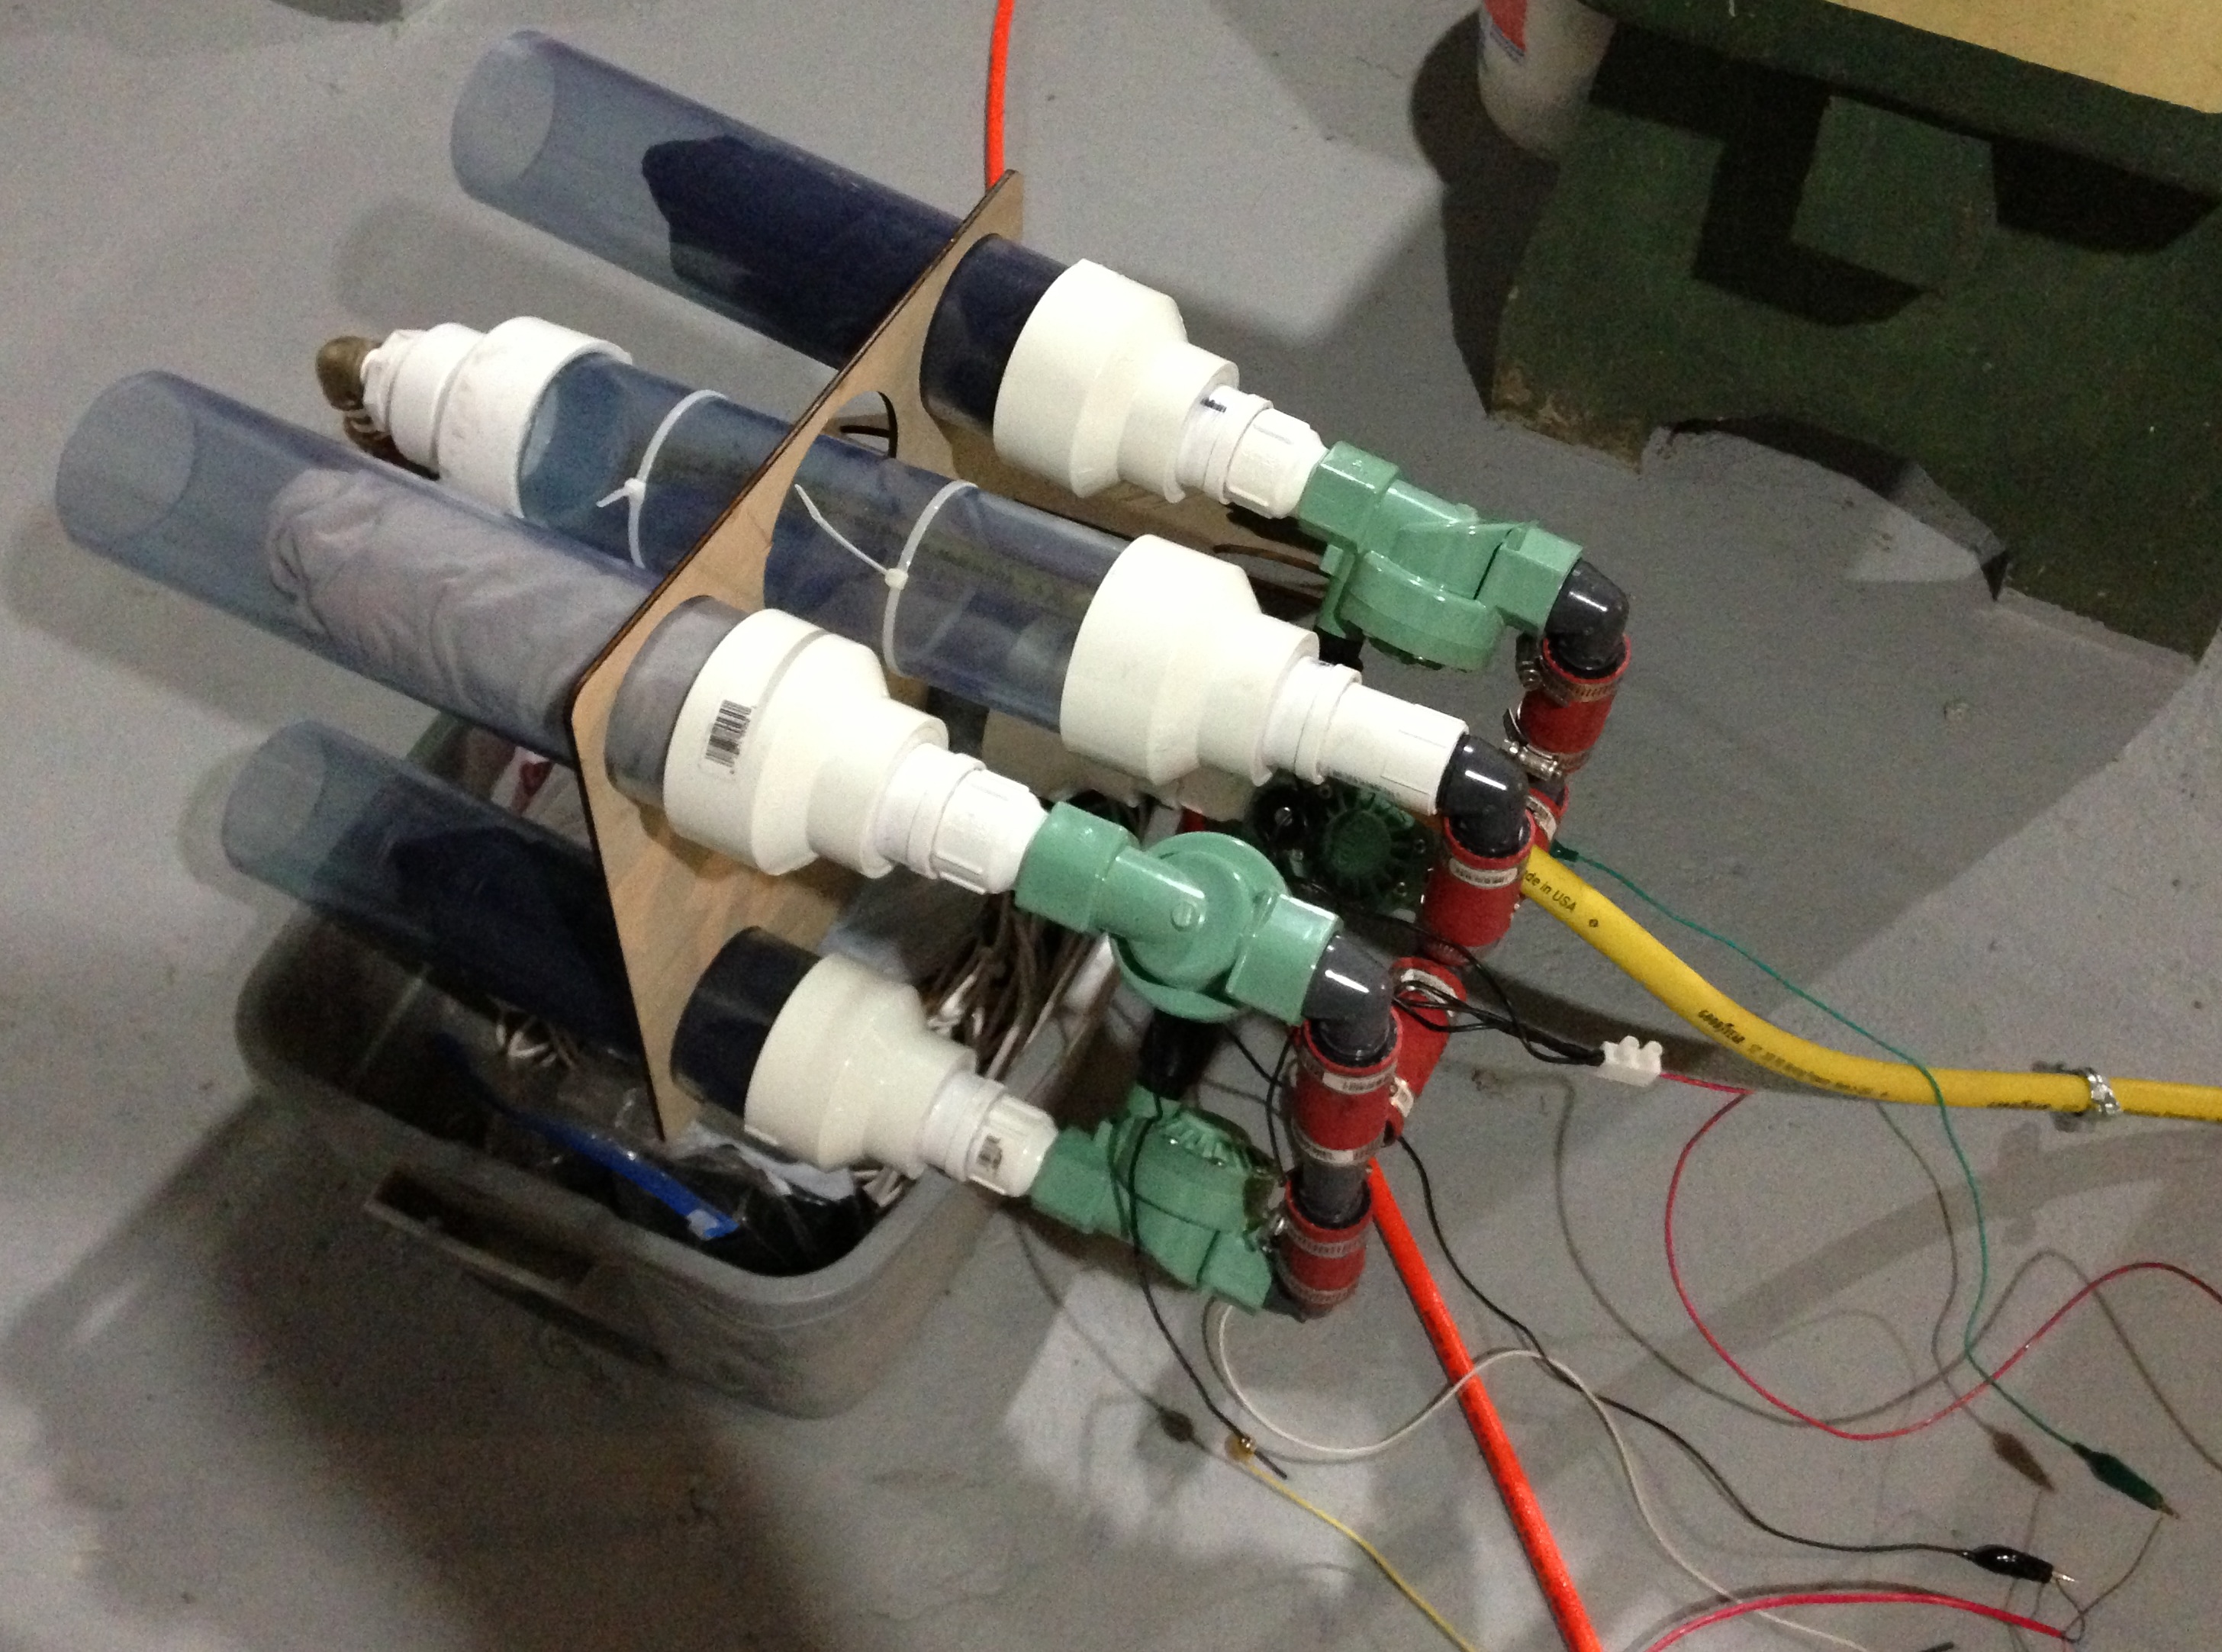
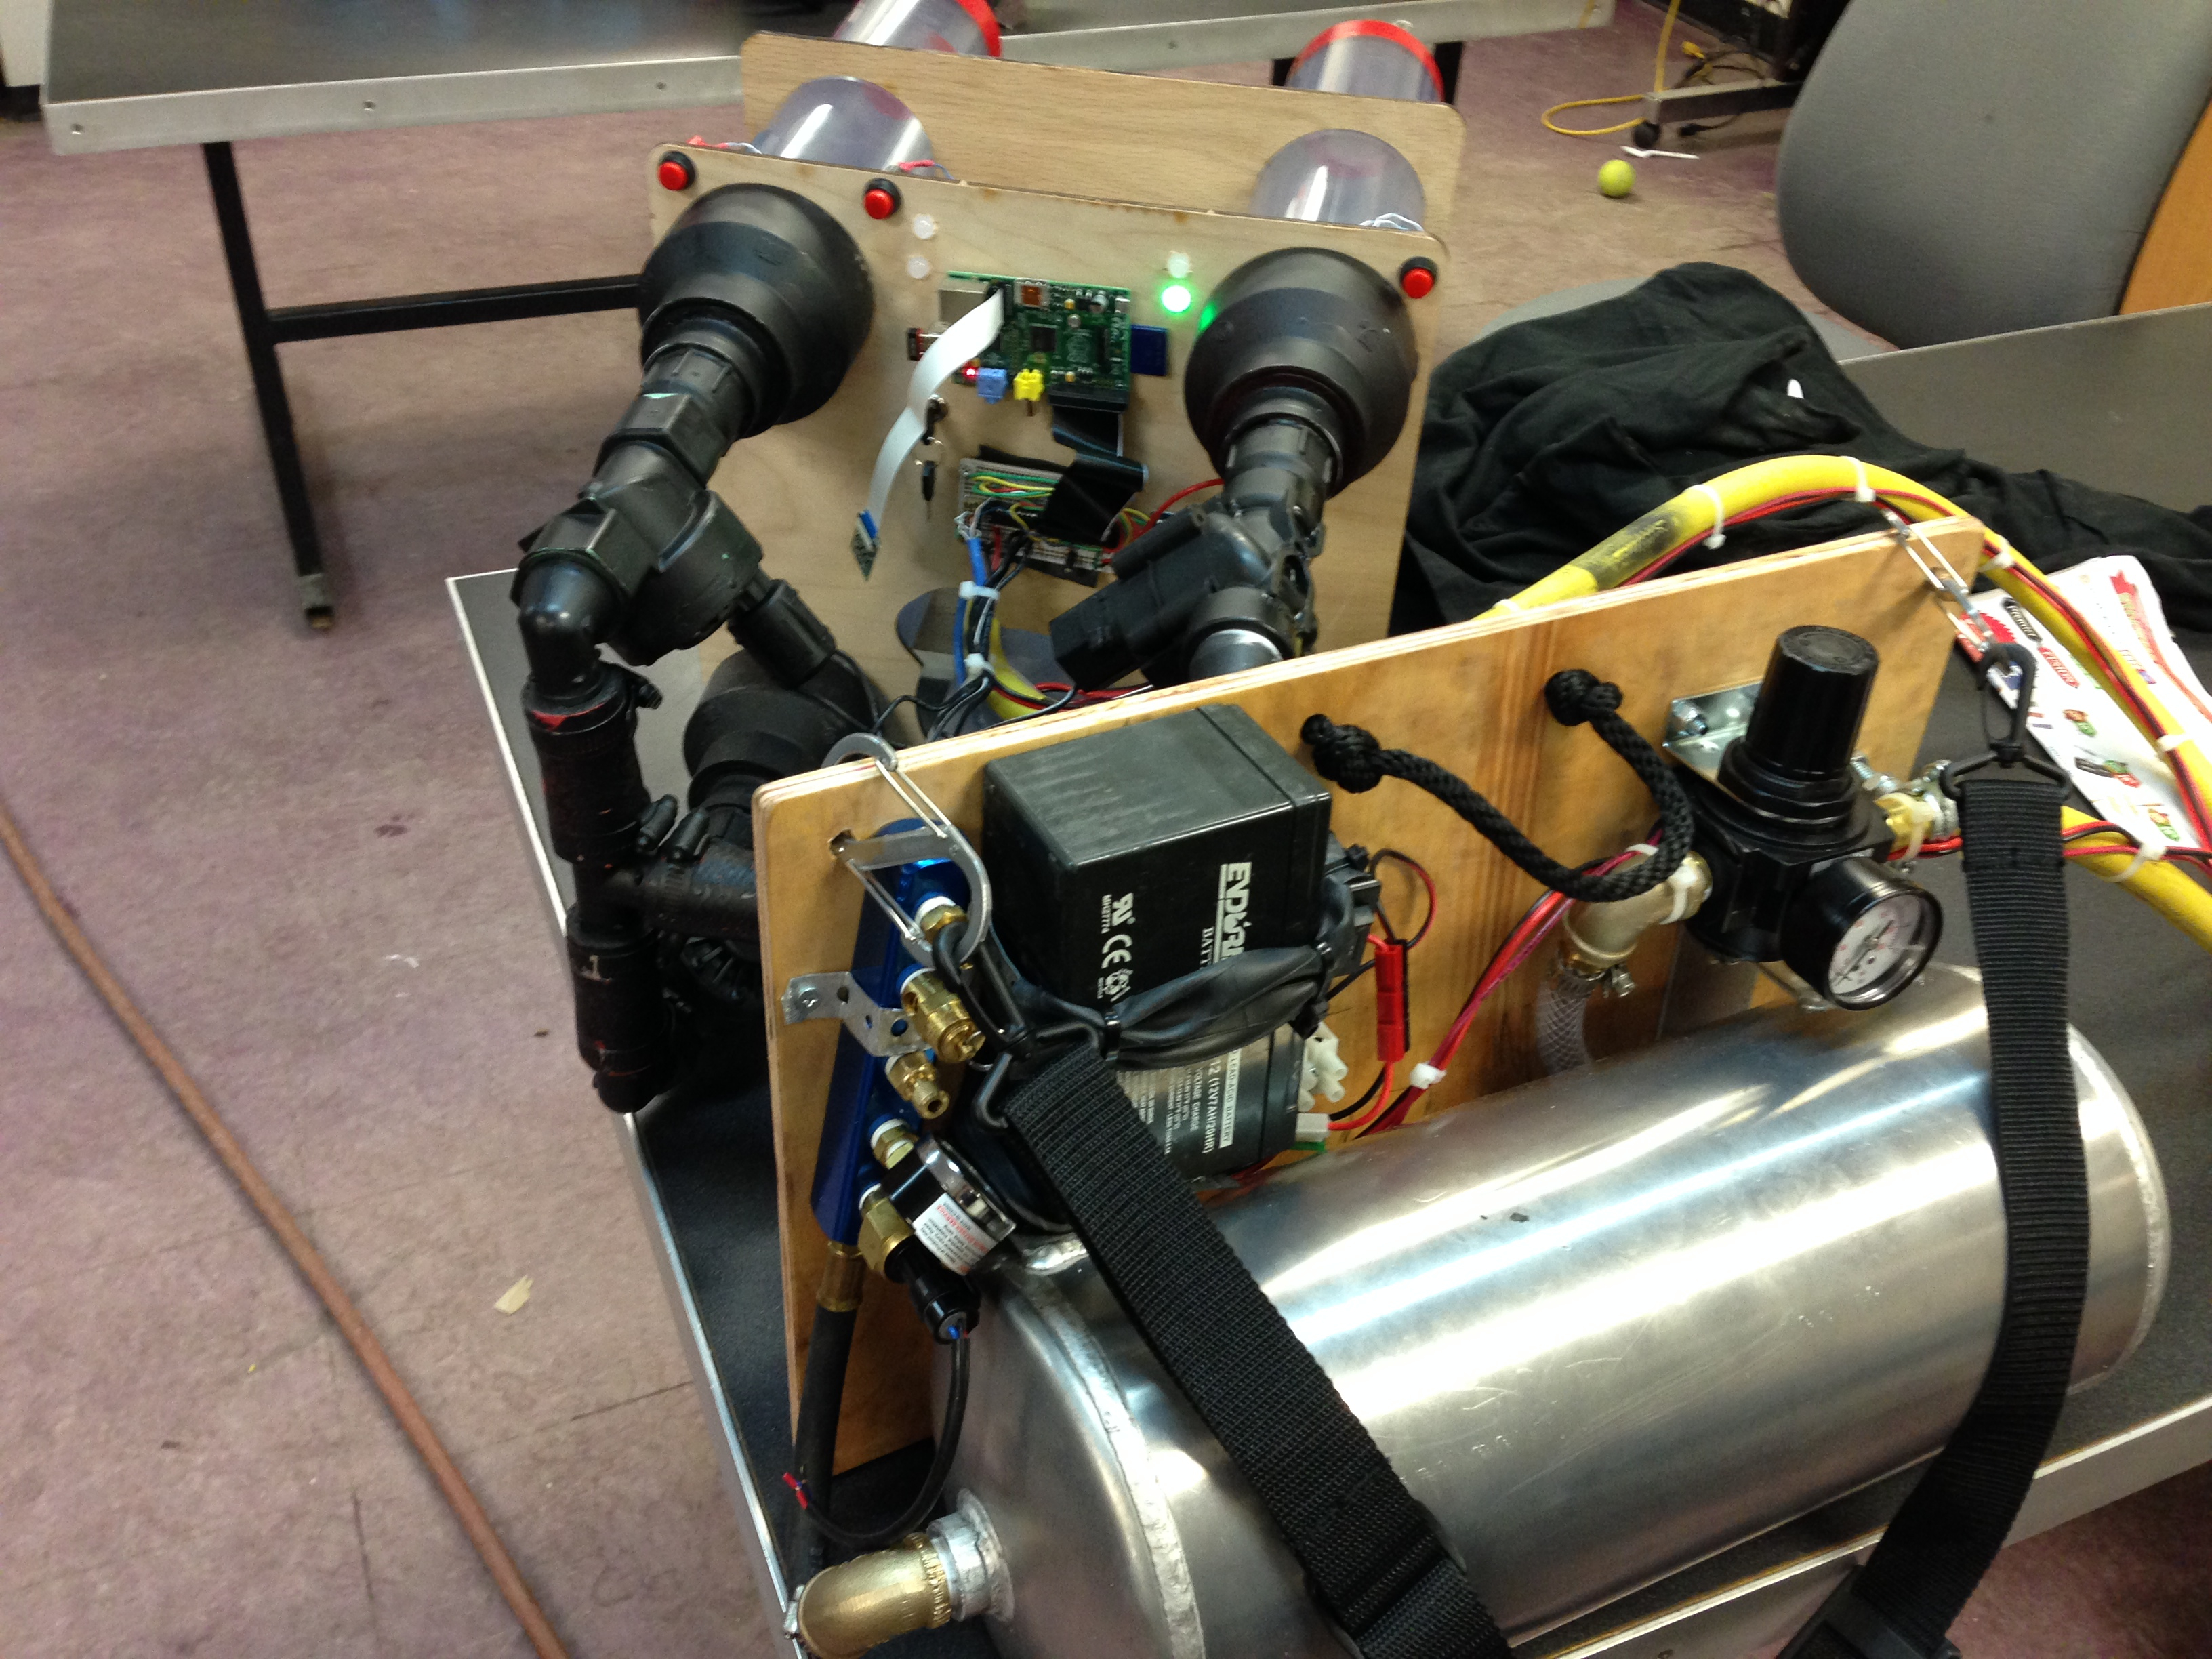
For this project, I used 4×14″ Schedule 40 PVC pipes for the barrels, and 1×14″ PVC Schedule 40 pipe for the accumulator. From our math (0.7gal x 4 = 2.8 gal), we will need at least a 3 gallon air tank to successfully fire 4 T-Shirts. The 3 gallon air tank will then refill the accumulator tank after each shot.
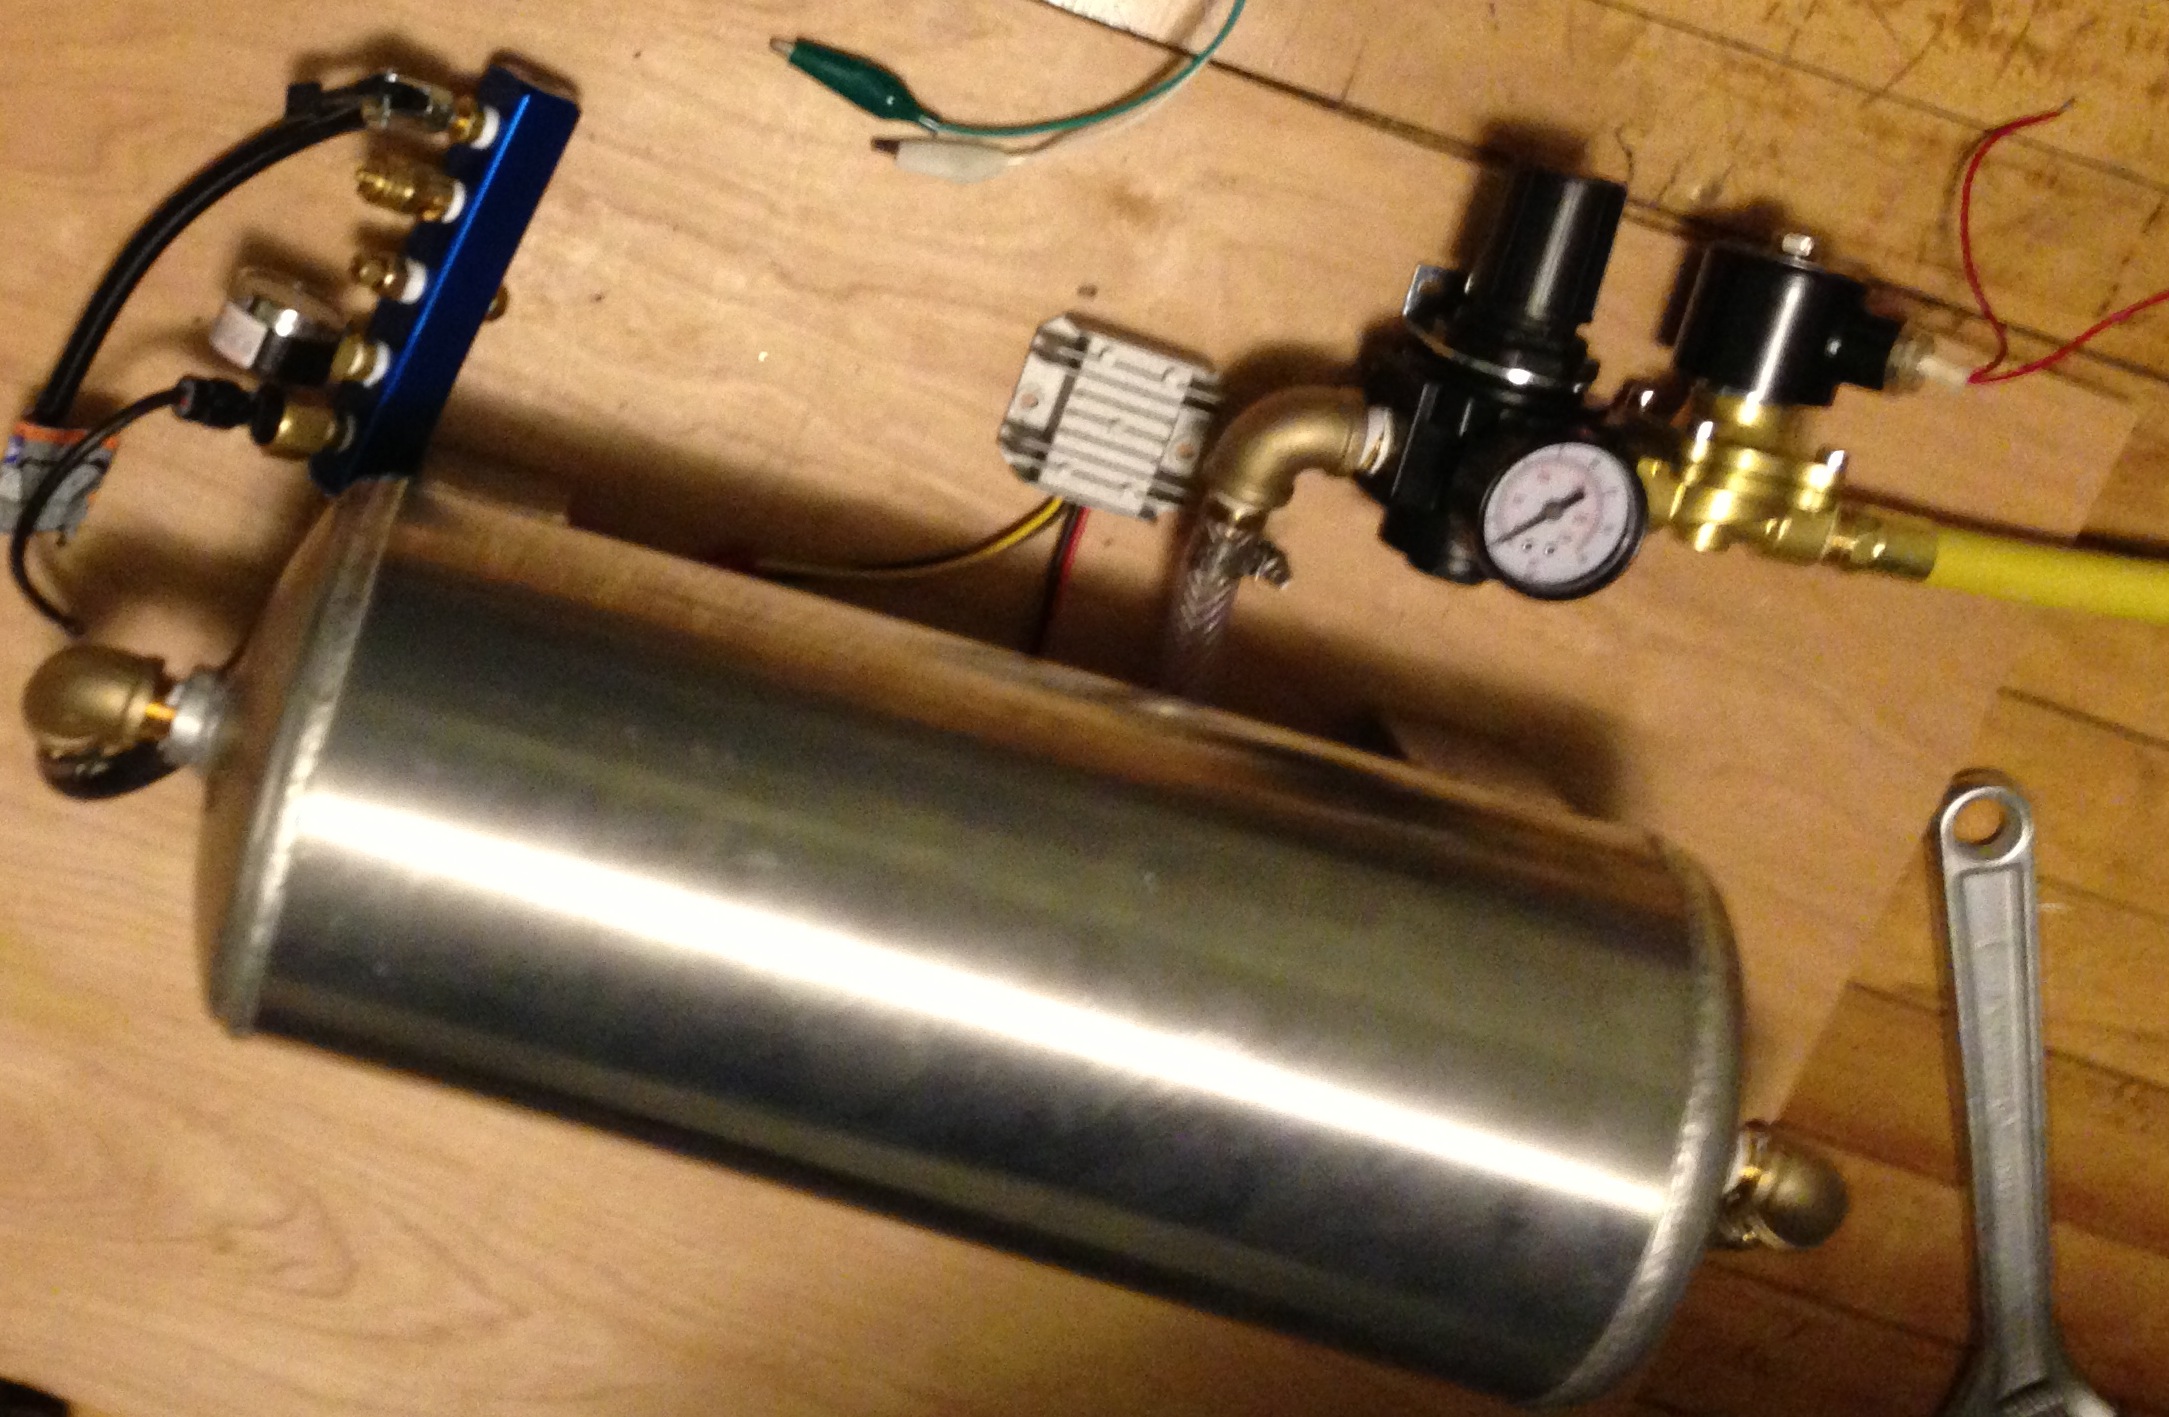
The original design had a valve after the air regulator. This however, allowed the system to depressurize, causing the sprinkler valves to shriek very loudly when pressurizing the system. Then I started thinking, sprinkler valves need a small amount of air to keep a pressure seal, and the rush of air caused them to oscillate until enough pressure was built up to close the valve.
That was the “A-AH!” moment of this project. I removed the valve from behind the regulator, and low and behold, that solved the issue. It also reduced complexity- as I don’t have to write the code to control another valve. Now the regulator keeps positive air pressure on the valves at all times, meaning that they immediately close after firing.
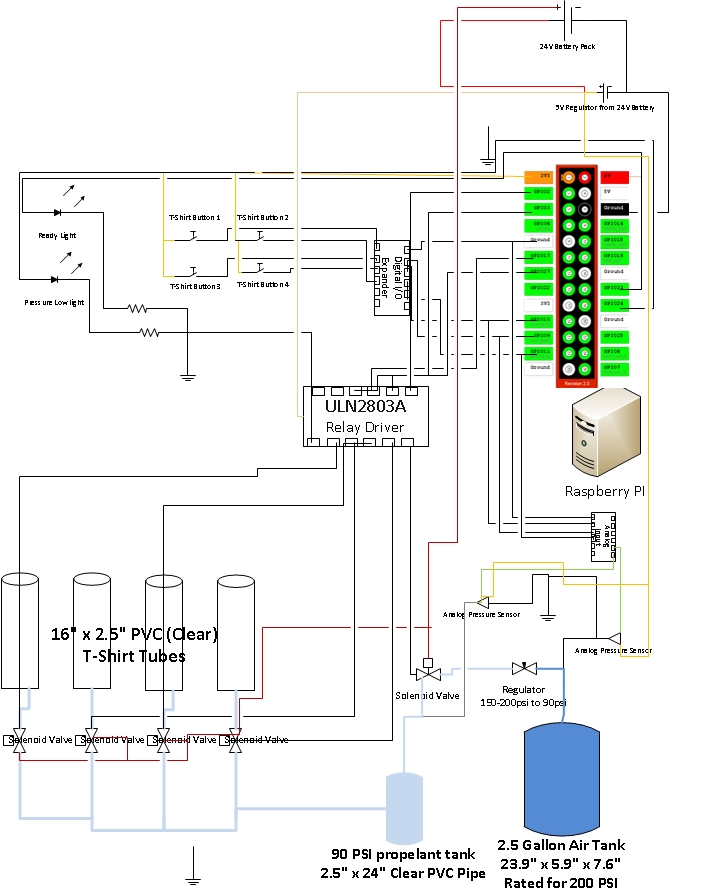
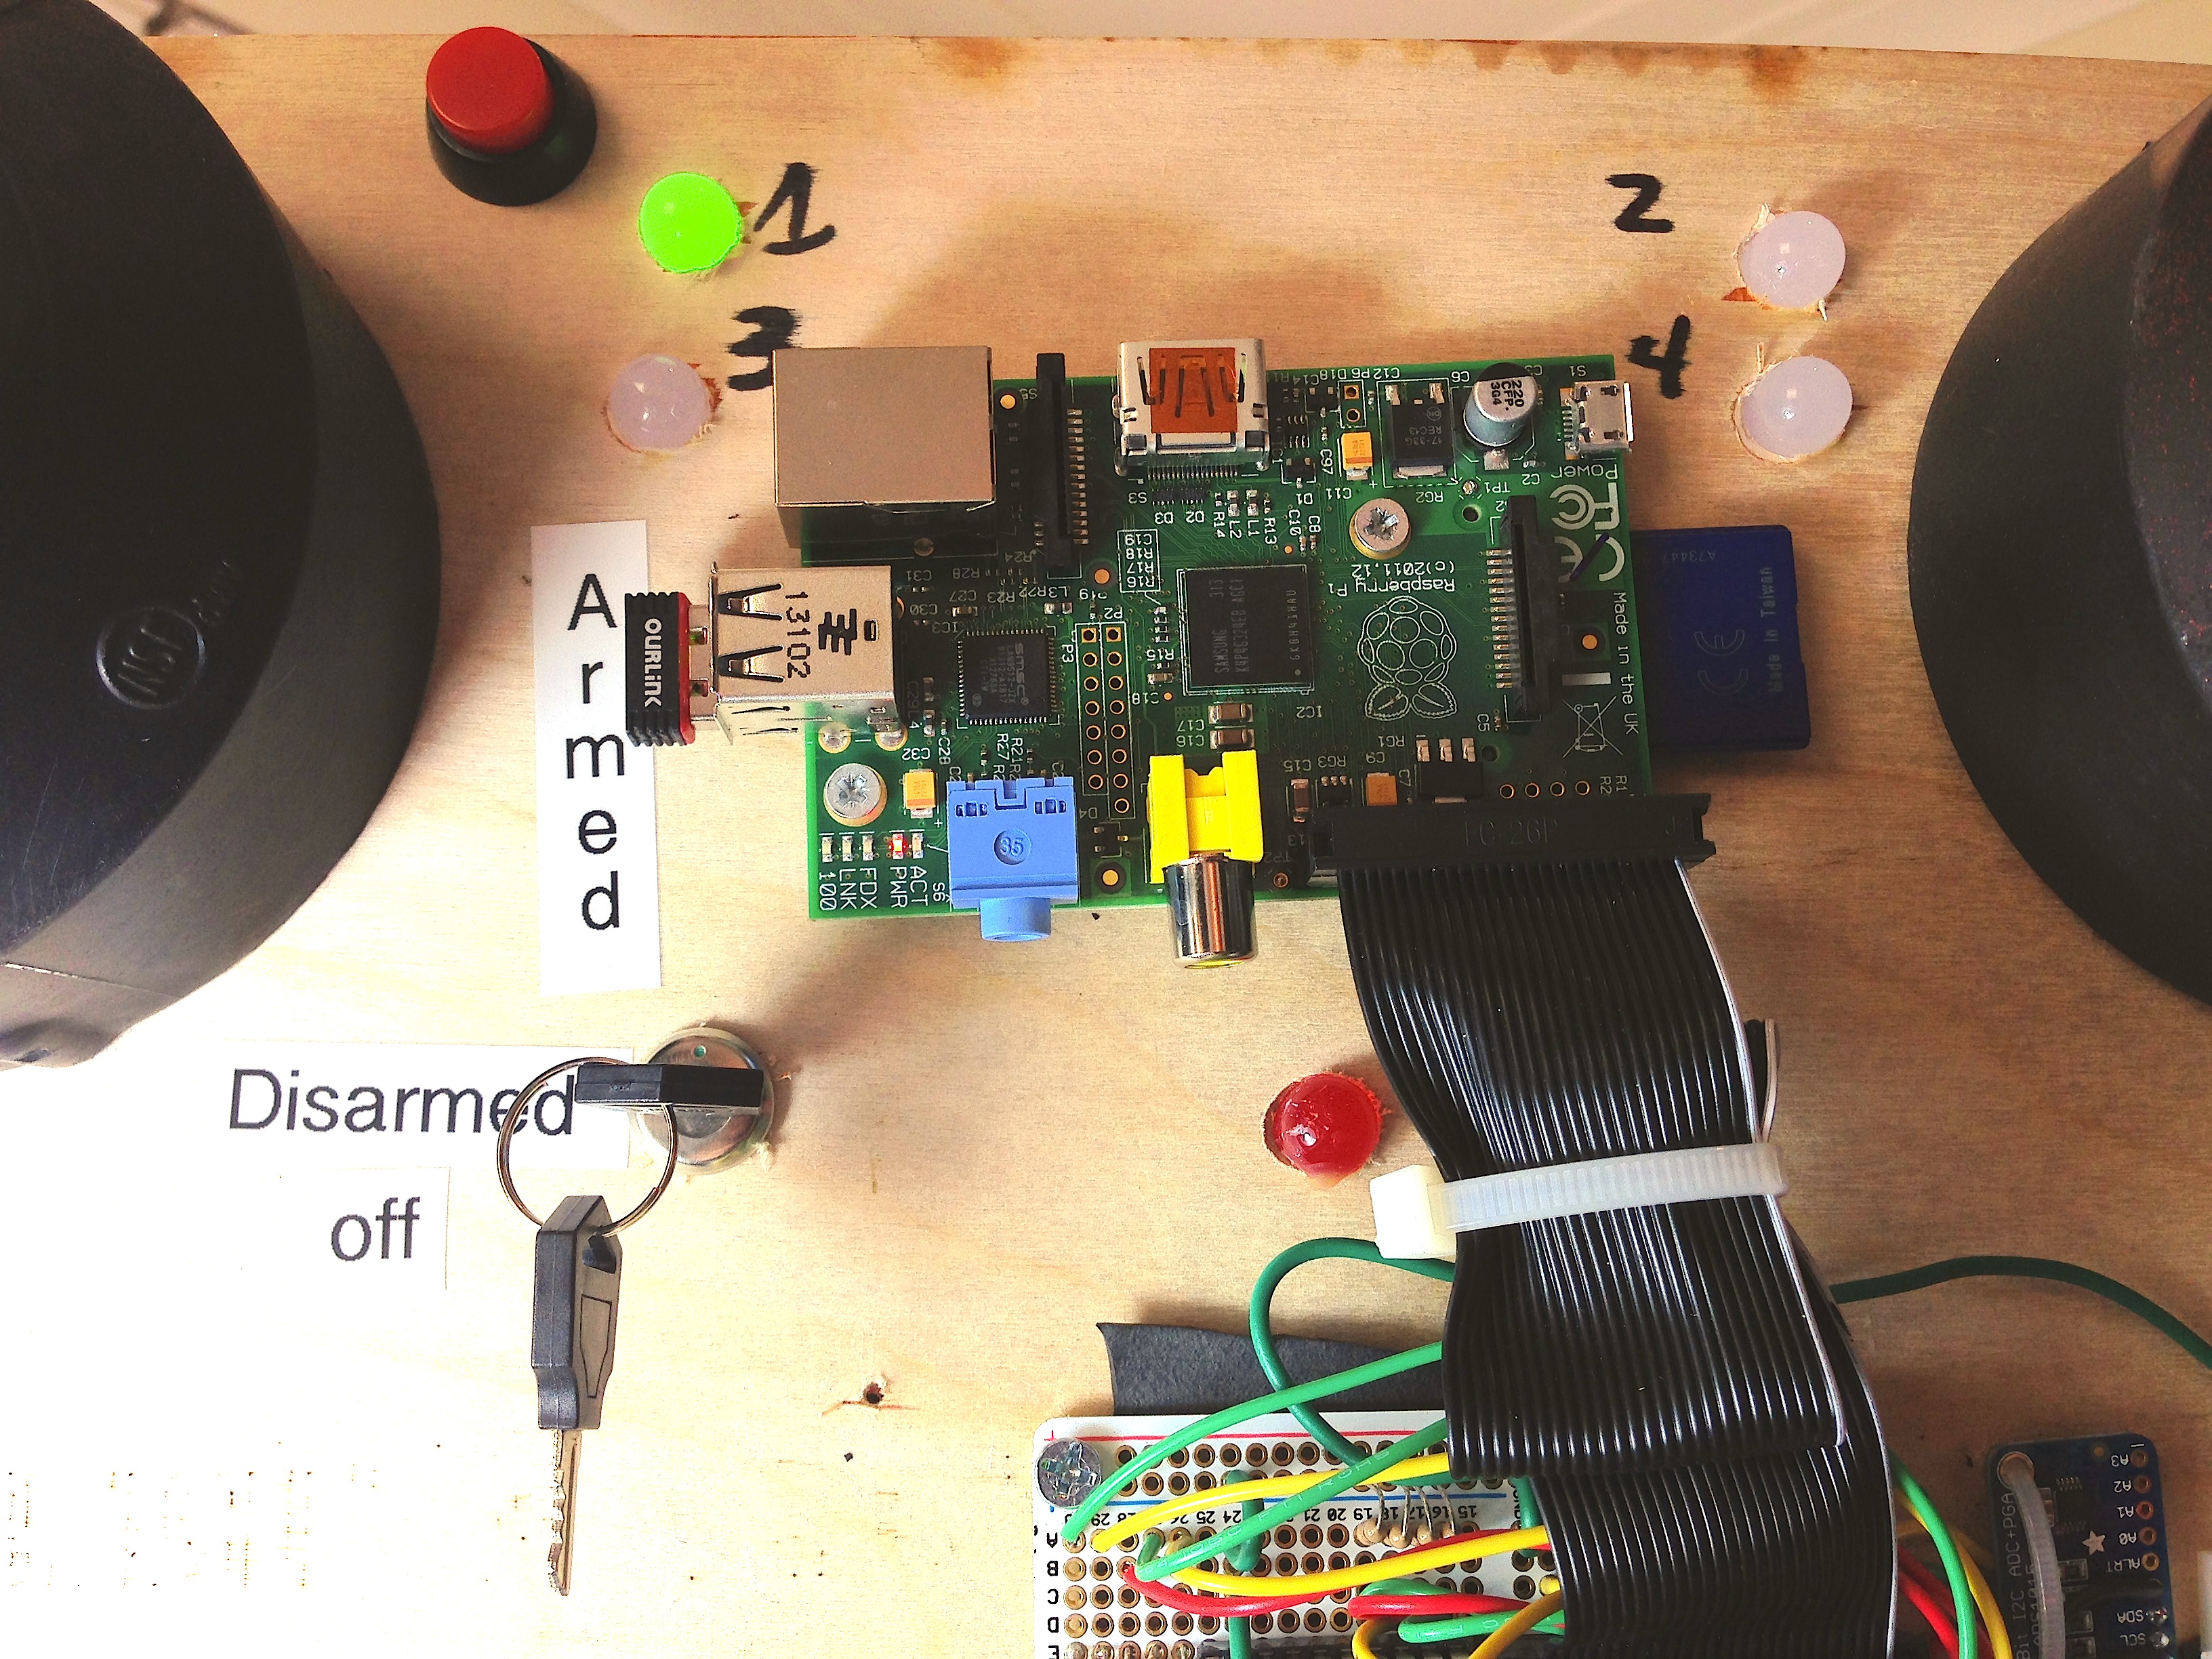
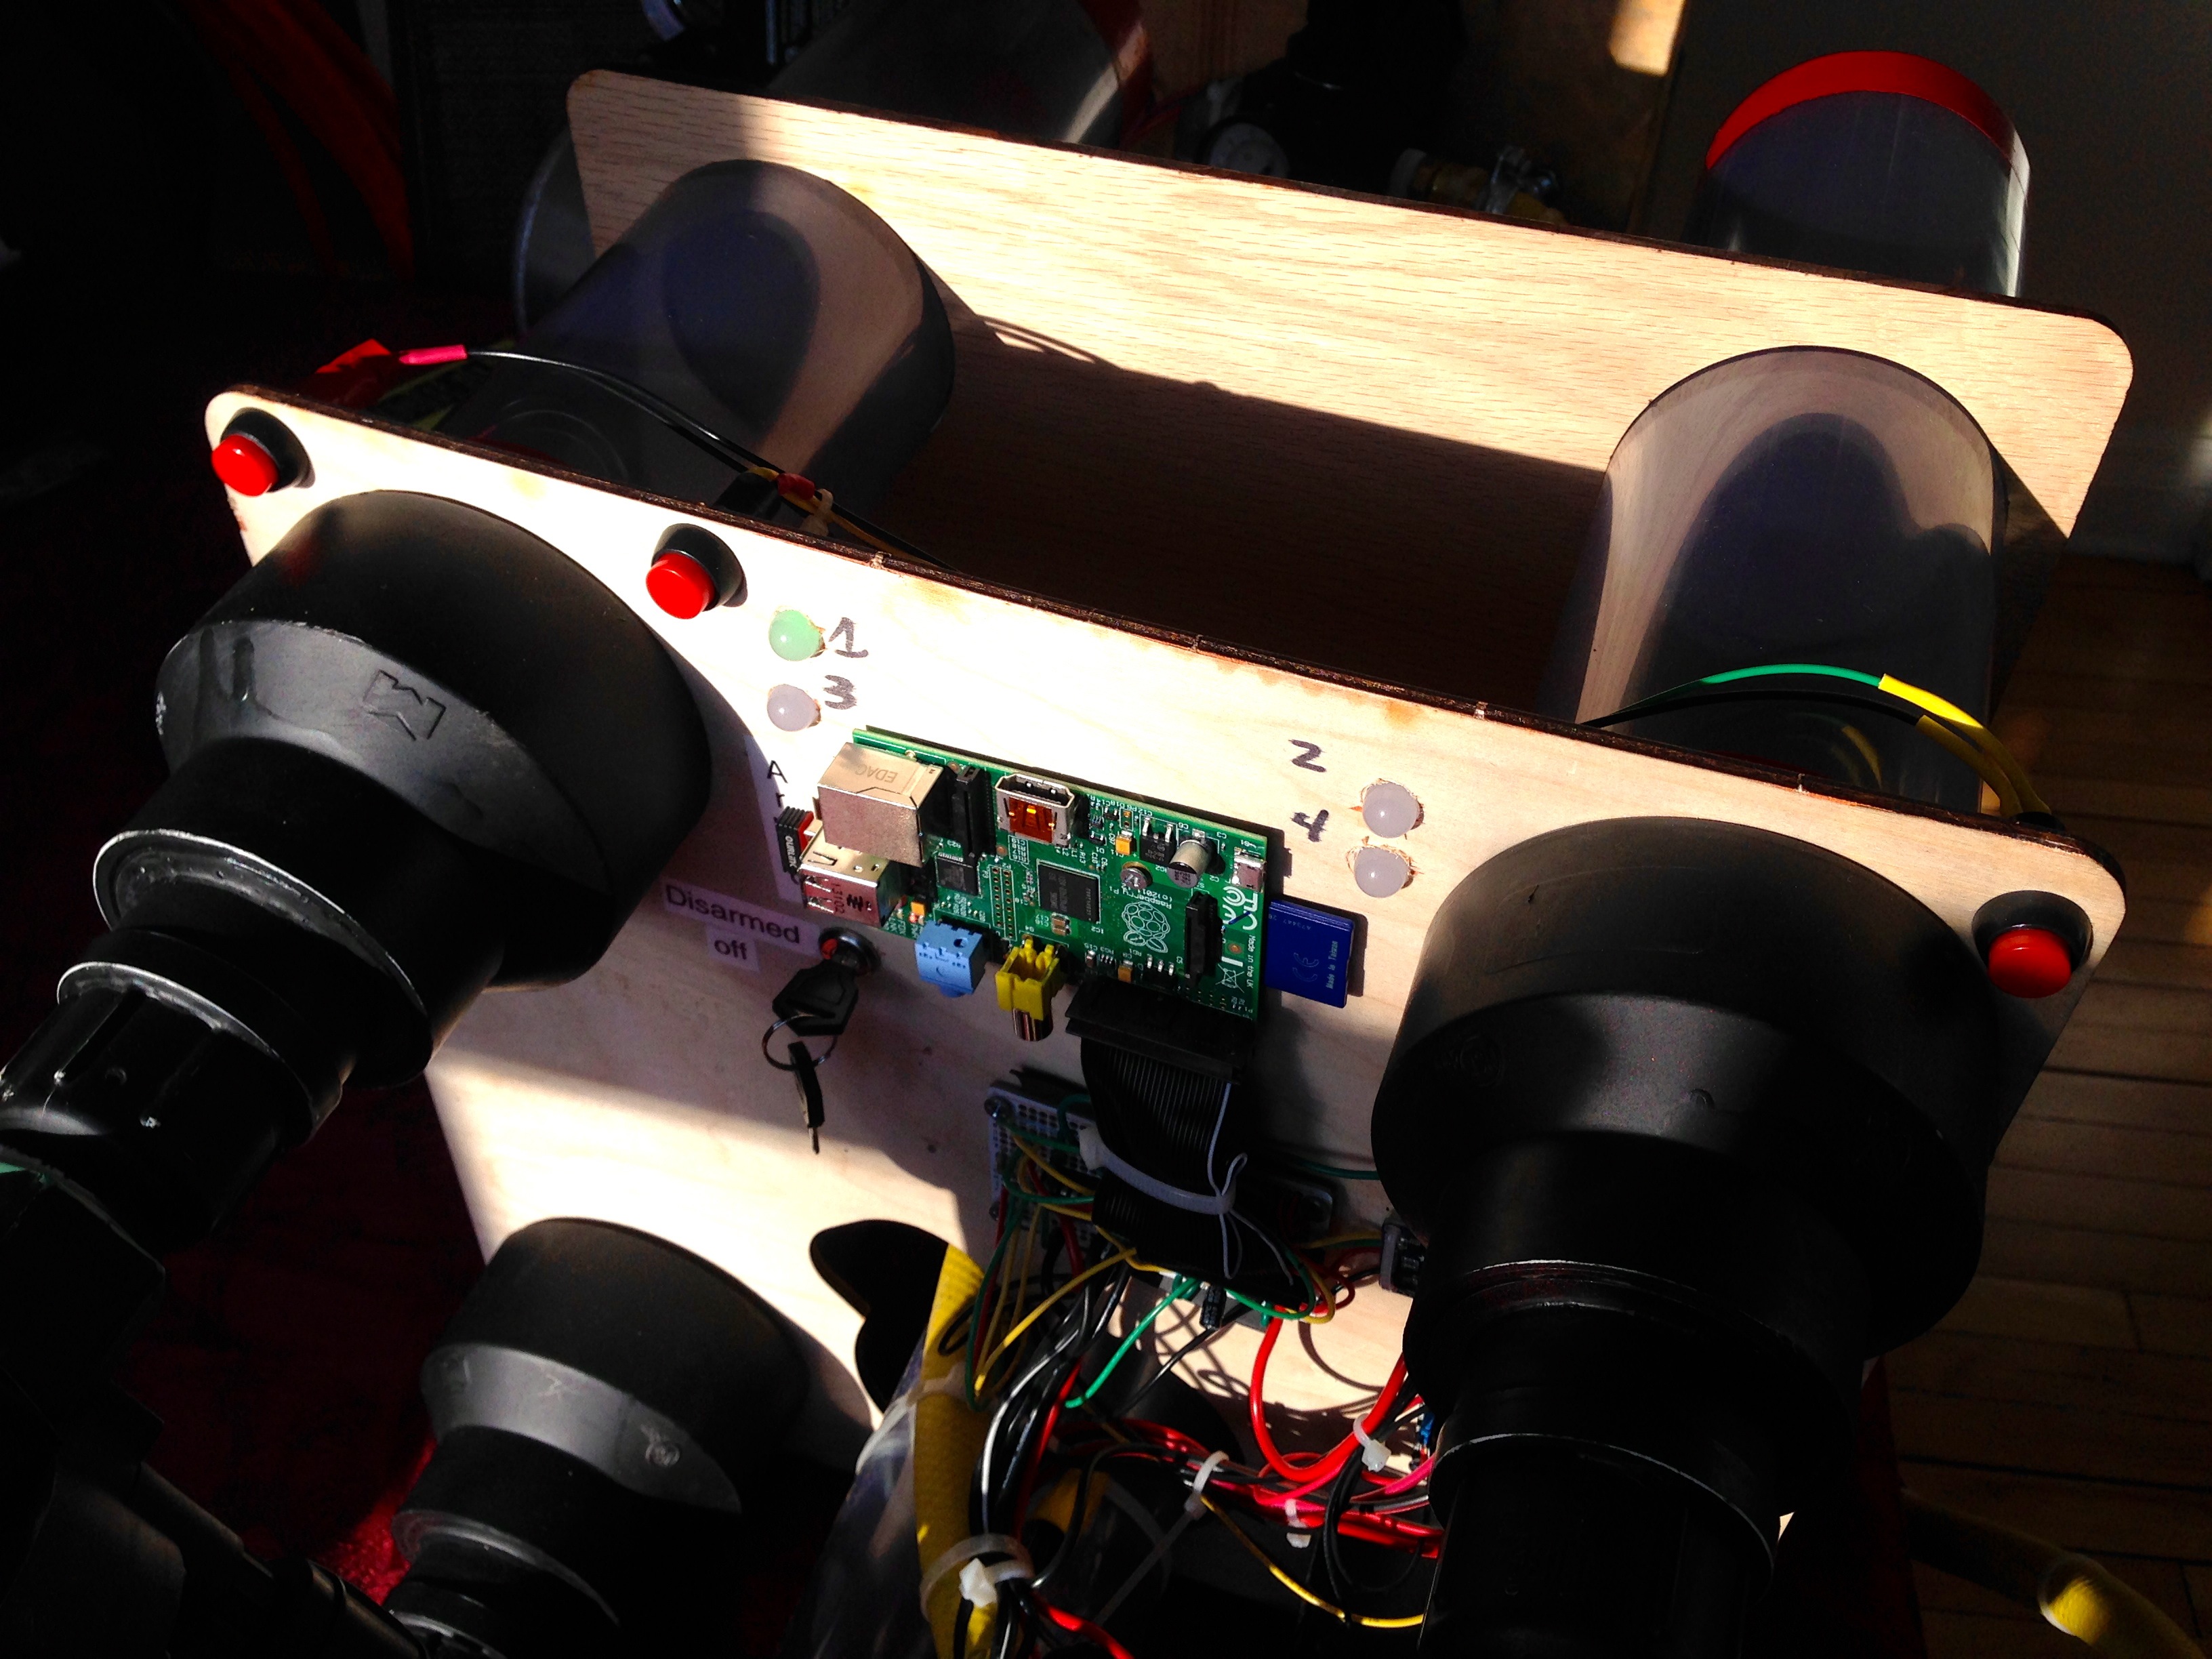
The Brains!
At the core of the build we are using a Raspberry Pi to control it. The Pi is a simple, low cost, computer that doesn’t require a lot of energy to run. This means that the computer boots, and runs the program the entire night of the roller derby bouts. In addition, the Raspberry Pi has a camera and wifi module that we plan use to post photos and videos from the T-Shirt launches.
Power
The sprinkler valves require at least 12V to energize the solenoids in order to open the sprinkler valves. So, that means that we needed a higher voltage battery then just a typical USB charger battery. However, we also need a 5V power supply, as the RPi requires 5V, as well as the relay that we are using to arm/disarm the cannon’s sprinkler valves.
For this, I used a 12V 7Ah battery, and a 12V to 5V 25Watt car power converter I purchased on eBay.
Electronics
Each sprinkler valve has a solenoid that holds in a small amount of air pressure. To open the valve, we need to energize the solenoid, and release the air. I could easily to use a large and expensive relays to open the valves, however each valve control only draws ~300ma of power. I found that a darlington transistor array (ULN2803) can sink up to 500ma per channel, and to fire 4 barrels, we only need 4 of the 8-channels on the ULN2803.
There is user input from two buttons. One button that selects the barrel (1-4), and one (technically two buttons wired in-series) for the firing mechanism.
Additionally, I wired up an Adafruit 12-bit analog board to pull analog data from things such as the pressure sensor. This is still a work in progress.

When I rolled up a T-shirt and stuffed it in the tube, it gave off all kinds of static electricity. I figured out that static electricity caused the software to interpret the falling edge of the static as a false button push, thus almost causing a misfire.
To ensure that we don’t have any possibility of a misfire, I added a relay to turn on and off the 12V power to the solenoids. I then updated the software from looking for a falling edge to requiring that the button is pushed for at least 0.5 of a second before it would launch.
Software
For the software, I want it to be as simple and strait forward as possible. The main program uses Python and the GPIO python libraries for the Raspberry Pi. GPIO is General Purpose In/Out, and these pins allow us to interact wit the real world. The user is able to select a barrel for a launch, and by pushing and holding both fire buttons, and it opens the solenoid valve for X milliseconds to fire a T-Shirt. In the case of the Orbit valves, they only take 8 tenths of a second to purge the valve, and open. Where as the RainBird valves takes 18 tenthes of a second to purge and open.
Future code upgrades include: Twitter, Raspberry Pi Camera, Analog sensors, Bubble blowers, etc.
The code for the Cannon can be found on GitHub here.
A list of hardware and parts can be found on Google Docs.
Flick photo set here.
If you are in Minnesota, you should come see it in action at a Roller Derby game. For dates and tickets Check out the Minnesota RollerGirls Events page.
First test
This was the first test of the launcher, taken just after moving houses. (Please excuse the clutter)
[iframe src=”http://player.vimeo.com/video/84075577″]

3 thoughts on “MNRG Raspberry Pi powered T-Shirt Cannon”
Comments are closed.